[Three.js] 3D 라이브러리를 사용해서 태양계 만들어 보기
지난 2월까지 Febase 라는 프론트엔드 스터디를 했었다. 벌써 시즌 4까지 진행했다. Fabase는 프론트엔드 개발자들끼리 모여서 프론트엔드 관련 주제들을 가지고 학습하는 모임으로 매 시즌마다 다른 주제를 가지고 스터디를 진행한다. 이번 시즌인 시즌 4는 three.js 라이브러리를 공부하면서 3D 애니메이션을 만들어 보는 스터디를 진행했다.
강의는 three.js-journey 라는 웹 사이트의 강의를 들었다. 지금까지 전세계에서 2만7천 명 이상이 들은 three.js 강의이다. 이 강의가 시작된지는 꽤 오래되었고, 강사가 프랑스 분이신데 지속적으로 강의를 추가추가 해주시는 것으로 알고 있다.
강의를 들으면서 공부한 이후에 나를 포함한 4분 정도의 개발자 분들과 작은 프로젝트를 해 보았다. 여러가지 주제가 나왔고, 그 중에 투표를 통해 태양계를 만들어 보는 프로젝트를 하기로 결정했다.
우리가 처음에 레퍼런스로 봤던 웹사이트는 이런 곳이었다.
https://theskylive.com/3dsolarsystem
3D Solar System Orbits Viewer | TheSkyLive.com
Visualize the orbits and the relative positions of the Solar System objects in an interactive 3D Solar System Simulator.
theskylive.com
디자인 리소스
먼저 디자인 리소스를 어떻게 구할지 알아보았다. 우리에게 필요한건 태양과 행성 8개(수금지화목토천해)에 대한 gltf 파일이었다. gltf 파일이란 GL Transmission Format의 줄임말으로 3차원 장면과 모델을 표현하는 JSON 형태의 포맷이다. 이 외에도 텍스처 이미지에 대한 파일도 필요했다. 이러한 파일들을 우리가 직접 만드는 건 힘들었다.
그래서 알아보다가 Sketchfab 이라는 웹사이트를 알게 되었다. 유료/무료로 3D 모델링 파일을 제공하는 곳이었다. 여기에서 우리가 찾는 태양계 관련 파일을 찾을 수 있었고, $9 정도 지불하고 구매했다.
https://sketchfab.com/3d-models/solar-system-f7896d085f474ef28631d88129268411
Solar System - Buy Royalty Free 3D model by KangaroOz 3D - Sketchfab Store
A 3D model of the Solar System with good scaled planets but compressed distances between them. The Blender native file is available in 2.91 version and includes animations.
sketchfab.com
GLTF를 웹에 로드하기
이제 디자인 파일도 구했으니, 해당 파일을 웹에 올려볼 차례다. three.js 공식 문서를 가보면 Loading 3D models 라는 페이지가 있다. 여기에서 하라는 대로 잘 따라하면 된다. 공식 문서에서도 gltf 파일을 사용하는 것을 권장한다. gltf 를 export 할 수 있는 도구들이 많은데 그 중 가장 위에 있는 도구는 Blender 이고 내가 공부했던 three.js 강의에서도 Blender 사용법을 가르쳐 주었다.
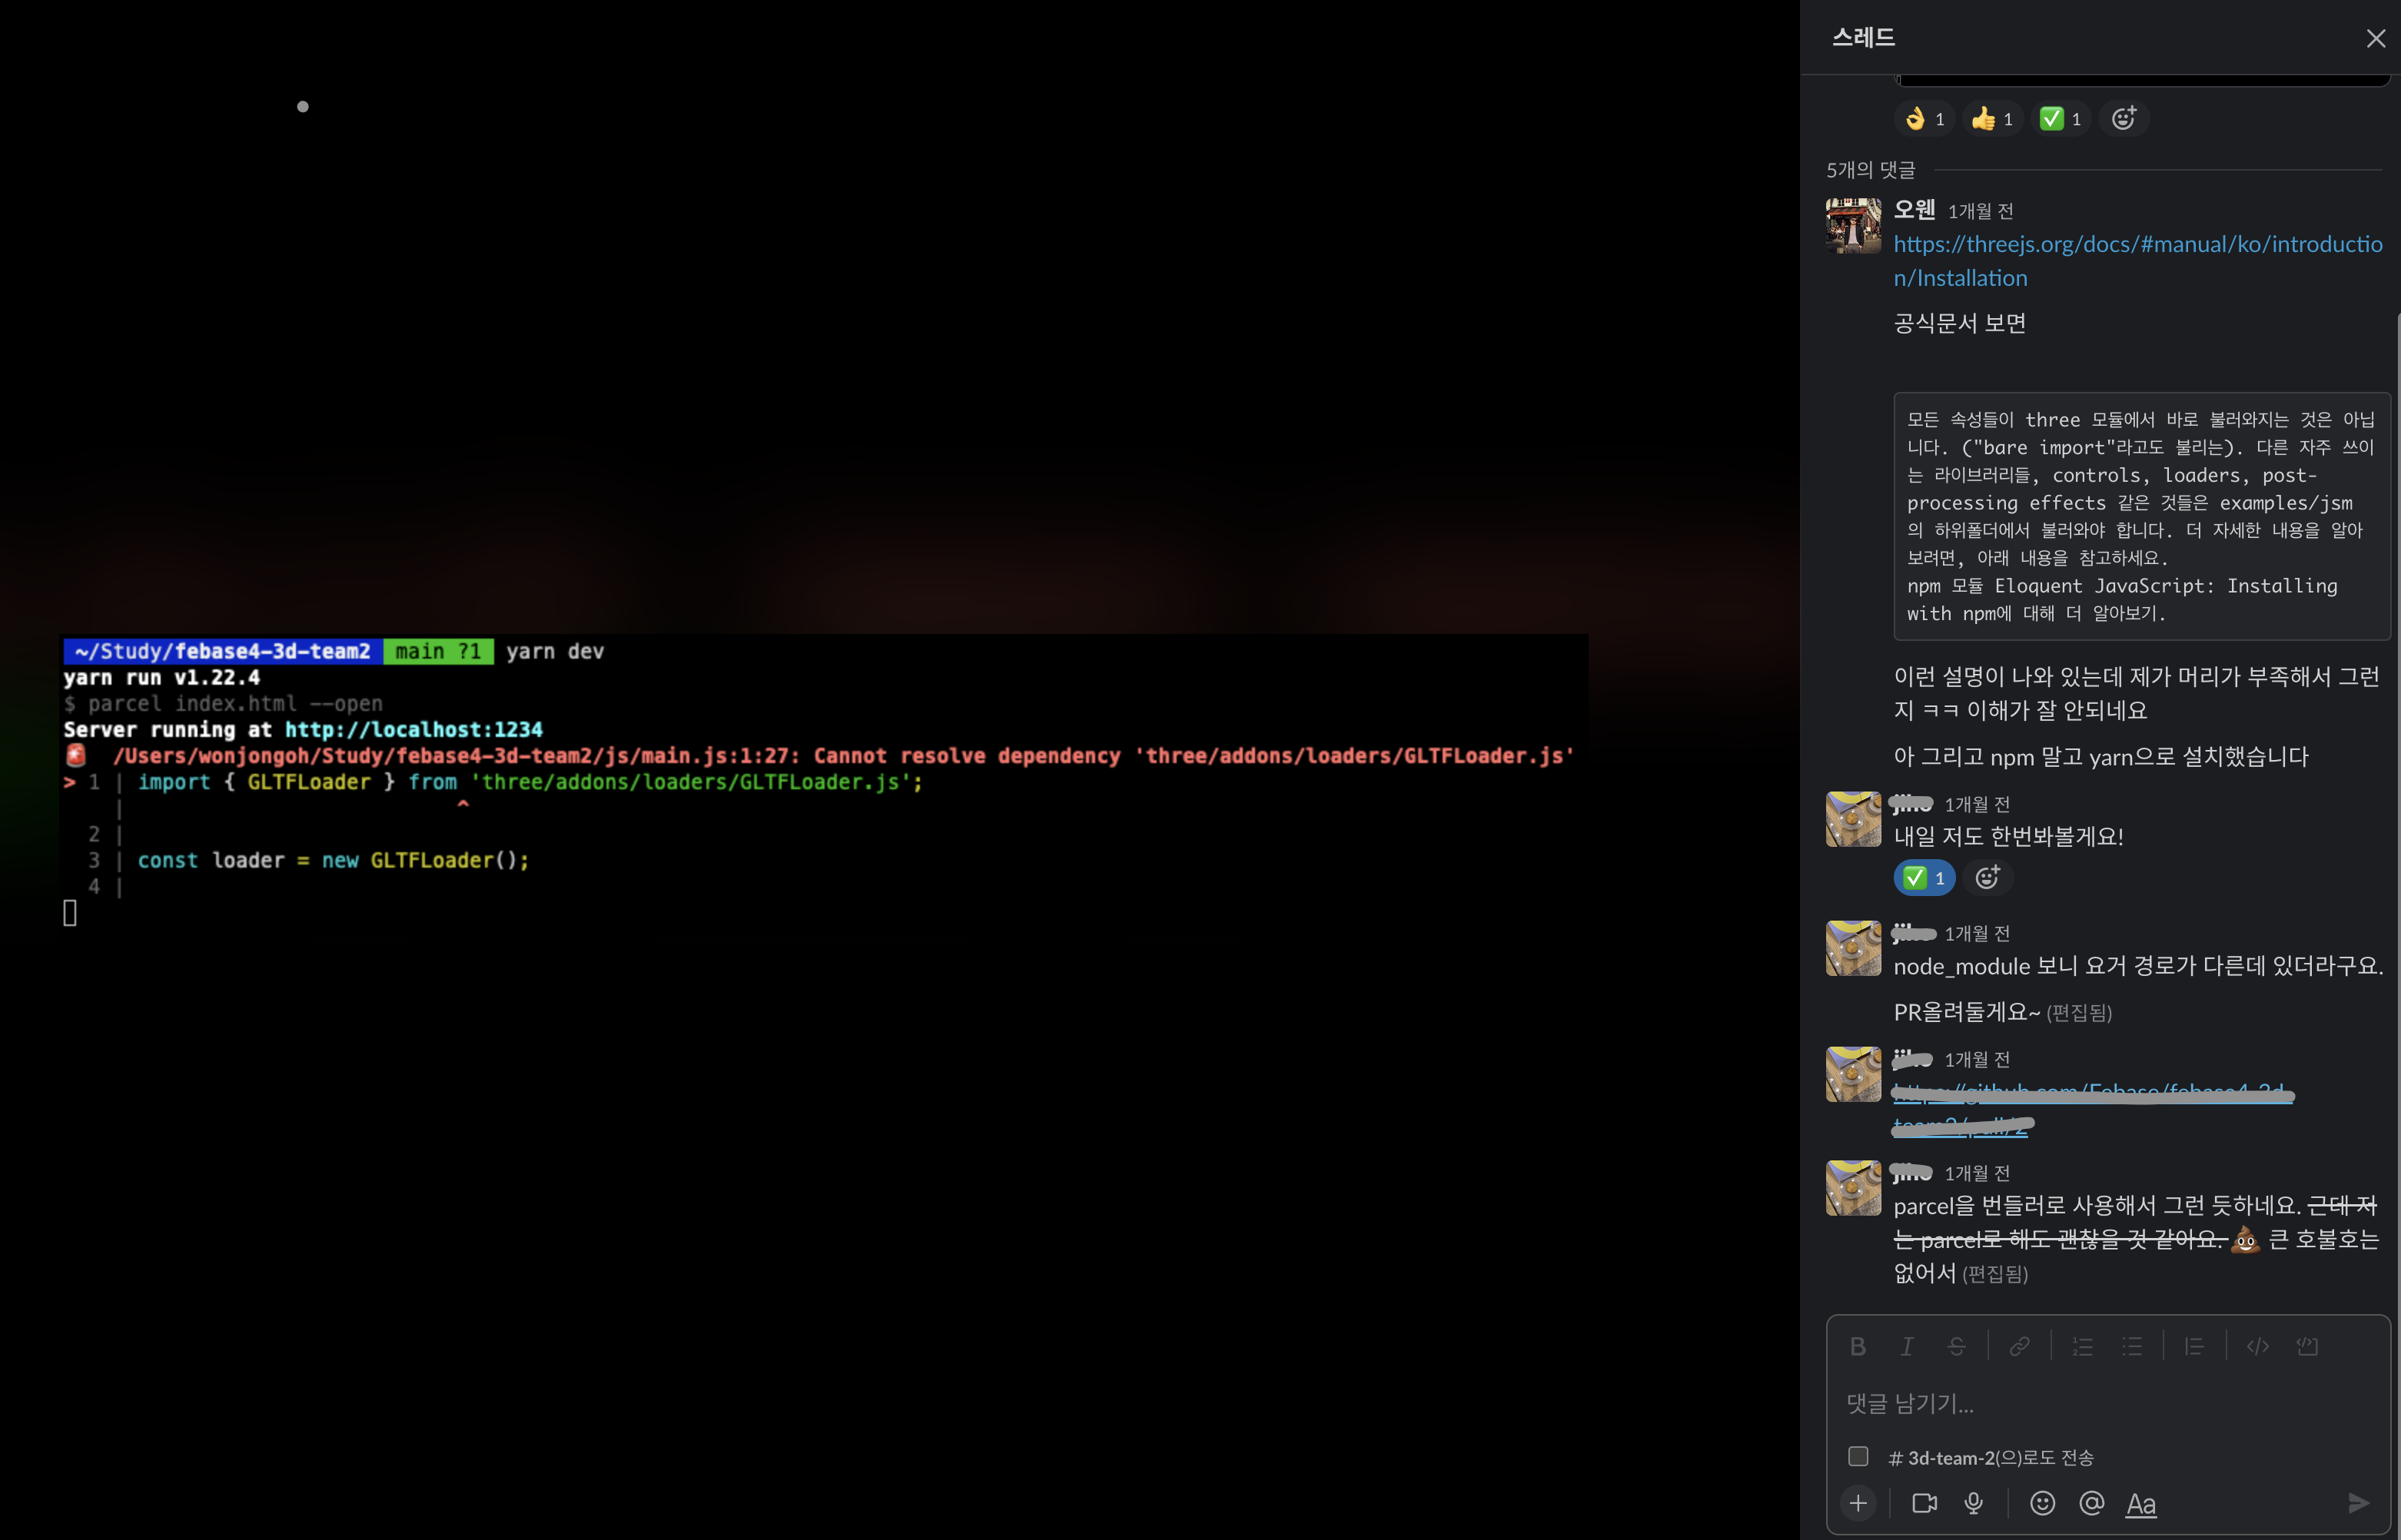
gltf 파일을 로드 하기 위해서는 three.js에서 제공하는 GLTFLoader 라는 클래스를 사용한다.
mport { GLTFLoader } from "three/examples/jsm/loaders/GLTFLoader.js";
import * as THREE from "three";

// ... 중략

/** Model */
const gltfLoader = new GLTFLoader();

gltfLoader.load(
  "three/scene.gltf",
  (gltf) => {
    scene.add(gltf.scene);
    camera.lookAt(gltf.scene);
    console.log("success");
  },
  (progress) => {
    console.log("progress");
  },
  (error) => {
    console.error(error);
  }
);
처음에는 이렇게 공식 문서에 나온 예제 코드를 따라 파일을 로드 해 보았다. 번들러로 parcel을 사용했는데, 경로 참조 문제가 있어서 조금 애 먹은 것 말고는 불러오는 건 잘 할 수 있었다. (스터디원들끼리 서로 문제 해결해 주면서 도움을 주고 받았다.)
gltf 파일을 성공적으로 import 해서 띄우니 우리가 sketchfab에서 보던 대로 3d 이미지가 웹에 그려졌다. 이 과정에서 카메라 위치를 조정하고 리사이징이 필요했다.
// main.js

window.addEventListener("resize", () => {
  // Update sizes
  sizes.width = window.innerWidth;
  sizes.height = window.innerHeight;

  // Update camera
  camera.aspect = sizes.width / sizes.height;
  camera.updateProjectionMatrix();
  // Update renderer
  renderer.setSize(sizes.width, sizes.height);
});

// ...중략

const scene = new THREE.Scene();

// Load Camera Perspective
const camera = new THREE.PerspectiveCamera(
  25,
  window.innerWidth / window.innerHeight,
  1,
  2000000
);
camera.position.set(1, 1, 200000);
texture를 분리해서 geometry와 함께 별도로 mesh를 구성
일차 관문은 통과 했고 이제 자전과 공전을 구현해 보려고 했다.
여기서 또 문제가 발생했는데, sketchfab에서 제공하는 gltf 파일을 그대로 사용하는 것에 한계를 느꼈다. 태양과 각각의 행성들이 별도의 오브젝트가 아닌 전체 태양계 하나로 작성이 되었기 때문이었다.
그래서 각각의 태양과 행성 texture를 분리했고, 이 texture를 각각의 geometry에 입혀서 총 9개의 구 형태의 mesh를 만들어 주는 클래스를 작성했다.
// planetData.js

export const PLANETS_IN_SOLAR_SYSTEM = {
  earth: {
    pascalName: "Earth",
    diameter: 0.5,
    textureUri: "./textures/Earth-map_baseColor.jpeg",
    pos: { x: -8, y: 0, z: 0 },
  },
  jupiter: {
    pascalName: "Jupiter",
    diameter: 0.5,
    textureUri: "./textures/Jupiter-map_baseColor.jpeg",
    pos: { x: -6, y: 0, z: 0 },
  },
  // ...
 }
// solarSystemManager.js
import { PLANETS_IN_SOLAR_SYSTEM } from "./PlanetData";
import * as THREE from "three";
import { FontLoader } from "three/examples/jsm/loaders/FontLoader.js";
import { TextGeometry } from "three/examples/jsm/geometries/TextGeometry.js";
const fontLoader = new FontLoader();
export default class SolarSystemManager {
/**
*
* @param {{
* loadingManager: THREE.LoadingManager
* } | undefined} options
*/
constructor(options = { loadingManager: undefined }) {
this.planetInfoMap = new Map();
this.synchronizeExternalPlanetData();
this.planetTextureMap = new Map();
this.loadAllPlanetTextures(options.loadingManager);
this.planetMeshMap = new Map();
this.generateAllPlanetMeshes();
}
synchronizeExternalPlanetData() {
Object.entries(PLANETS_IN_SOLAR_SYSTEM).map(([planetName, planetData]) => {
this.planetInfoMap.set(planetName, planetData);
});
}
/**
* 모든 행성의 Texture 생성
* @param {THREE.LoadingManager} loadingManager
*/
loadAllPlanetTextures(loadingManager) {
const planetTextureLoader = new THREE.TextureLoader(loadingManager);
for (const [planetName, planetData] of this.planetInfoMap.entries()) {
const texture = planetTextureLoader.load(planetData.textureUri);
this.planetTextureMap.set(planetName, texture);
}
}
/**
* 모든 행성의 Mesh 생성
*/
generateAllPlanetMeshes() {
for (const [planetName, planetData] of this.planetInfoMap.entries()) {
const group = new THREE.Group();
const material = new THREE.MeshBasicMaterial({
map: this.planetTextureMap.get(planetName) ?? undefined,
});
const diameter = planetData.diameter ?? 1;
const geometry = new THREE.SphereGeometry(diameter, 32, 32);
const mesh = new THREE.Mesh(geometry, material);
group.add(mesh);
// ... 중략
group.position.x = planetData.pos?.x ?? 0;
group.position.y = planetData.pos?.y ?? 0;
group.position.z = planetData.pos?.z ?? 0;
this.planetMeshMap.set(planetName, group);
}
}
// ... 중략
}이렇게 행성들을 각각의 독립적인 mesh로 쪼개니 공전, 자전 등 컨트롤을 하기에 더욱 더 수월해 졌다.
공전과 자전 구현하기
공전과 자전의 경우는 아래와 같이 행성 mesh에 rotation 속성과 position 속성을 조작해서 구현했다.
// solarSystemManager.js

setInterval(() => {
    planetMesh.rotation.y += (Math.PI / 10000) * planetData.rotationPeriod; // 자전
    // 태양 제외 공전
    if (planetName !== "sun") {
      group.position.x =
        planetData.cx *
        Math.cos(
          (Date.now() / planetData.orbitalCycle) * VELOCITY_PERCENTAGE
        );
      group.position.z =
        planetData.cx *
        Math.sin(
          (Date.now() / planetData.orbitalCycle) * VELOCITY_PERCENTAGE
        );
    }
  }, 10);
결론
이렇게 약 3주 정도의 짧은 기간동안 3D로 태양계를 만들어 보는 프로젝트를 마무리 했다.